
I am a huge fan of Azure CycleCloud. It makes administration tasks so much easier. Now, there are some cons of running it in Gov Cloud, such as the core-hours does not work, but that isn’t much of a big deal if you deploy to a subscription and just calculate the costs from that. Let’s talk about using Slurm and Star-CCM. Microsoft published a whitepaper back in 2020 using a PBS cluster and version 14 of Star-CCM. I prefer Slurm and version 17 is out for Star-CCM, so let’s look at a more updated tutorial.
Microsoft recently updated CycleCloud to version 8.3 last month. You can find the releases notes here. Search the Azure Marketplace for CycleCloud and provision an 8.3 cluster. One thing to note and this sort of makes me question some default provisioning, but by default, it’ll give a public IP to your cluster. One of the mystery’s of CycleCloud is using this on an internal network, not exposed to the internet. Most orgs have a S2S vpn or express route into their vnet. For my demo, I am deploying into a spoke that has a peered hub connected back to on premise. When you provision the cluster, do not select a public IP and it’ll assign a private ip. More about this later when we deploy Slurm.
Once your cluster is up, navigate to https://<privateIp> and add your name, ssh key and subscription details. These steps are documented here. Create a new cluster and select Slurm within the CycleCloud UI. I called my cluster slurm-test

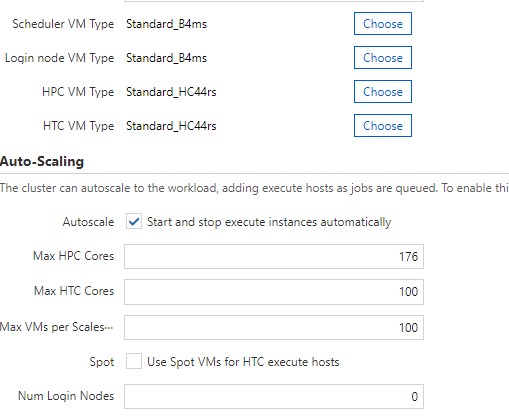
For required settings, I gave my scheduler and login node a VM type of Standard_B4ms. For my HPC and HTC VM sku, I am using an HC44rs. Since this is 44 cores per vm, I wanted a total of 176 cores which would give me 4 vm’s that I can submit jobs to.
In Required Settings, make note of your Default NFS Share. I provisioned 256GB since I have a rough idea of what my resulting sim files will be. The thing to note is that I had one heck of a time trying to expand this disk once the scheduler was provisioned. When you terminate the scheduler, it does not delete this disk. When you go to start your scheduler back up, it re-attaches this disk. I could resize it in Azure, but AlmaLinux was not seeing the new size. Maybe I was just doing something wrong, but I resized numerous disks in RHEL and CentOS in Azure with no issue.
In the Advance settings screen is where I want to talk about private networking. Uncheck Name as Hostname. This will write all the hostnames into its hosts file locally, so all the compute nodes and scheduler can talk together. My Vnet is using custom DNS and not Azure, so these nodes need a way to resolve to each other, hence unchecking that checkbox. Also, uncheck all the Advanced Networking checkboxes. This cluster will only be accessible from on premise and not the internet.

In the cloud-init configuration, let’s add some things for the scheduler and HPC. I am not using HTC, login nodes or an HA scheduler, so I am skipping using cloud init there.

#cloud-config
runcmd:
   - yum install -y libSM libX11 libXext libXt libnsl.x86_64 git mpich
   - wget https://aka.ms/downloadazcopy-v10-linux
   - tar -xvf downloadazcopy-v10-linux
   - sudo cp ./azcopy_linux_amd64_*/azcopy /usr/bin/
   - echo "/dev/mapper/vg_cyclecloud_builtinsched-lv0   /sched   xfs defaults 0 0" >> /etc/fstab
- echo "/dev/mapper/vg_cyclecloud_builtinshared-lv0 /shared xfs defaults 0 0" >> /etc/fstab 
#cloud-config
runcmd:
   - yum install -y libSM libX11 libXext libXt libnsl.x86_64 git mpich
The initial cloud init installs some requires packages I need for StarCCM and pulling some git files down. The thing to note are the 2 lines that write into the /etc/fstab. This is a bug and no idea why this wasn’t fixed in the 8.3 release. If you don’t add these lines in, when rebooting the scheduler, you won’t be able to SSH to it. Microsoft confirmed this for me via a support case.
At this point, we are ready to start our Slurm cluster. Hit the Start button and give it about 5-10 mins to provision a VM and install the software.
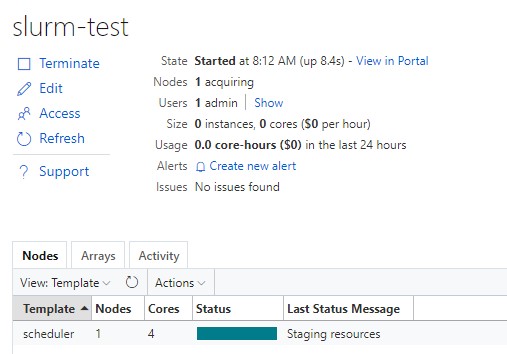
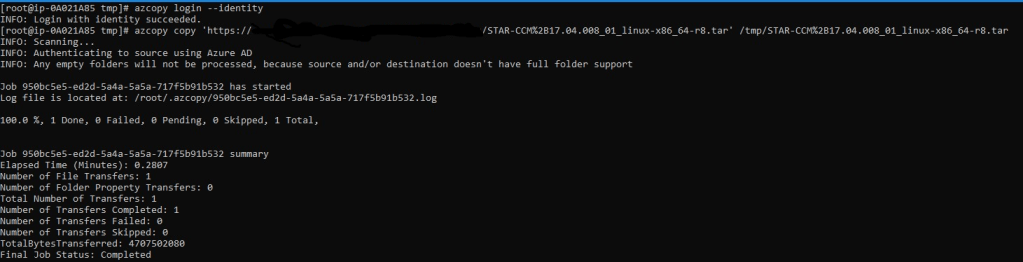
Once the scheduler is running, highlight it and select Connect to get your SSH command given out to you prepopulated with your username and IP. Once connected, copy down your Star-CCM file. I am using a managed identity from my scheduler to connect to a storage account. In my cloud init script, I install azcopy to make life easier to get files on and off the scheduler.
Before I install Star-CCM, I navigated to /shared and created an apps folder to hold my Star-CCM install and a data folder to hold my job files. Assign permissions to those 2 folders with the account you plan to execute jobs under (If you plan to run under root, which you shouldn’t, you’ll need to add 2 env var’s which Slurm will complain and tell you after doing a sbatch) With that, we can then untar the file and run a single command to silently install.
sudo ./STAR-CCM+17.04.008_01_linux-x86_64-2.17_gnu9.2-r8.sh -i silent -DPRODUCTEXCELLENCEPROGRAM=0 -DINSTALLDIR=/shared/apps -DINSTALLFLEX=false -DADDSYSTEMPATH=true -DNODOC=true
I have a license server already, so I am not installing it hence the installflex=false.
Alright, at this point, Star-CCM should be installed. Copy your .sim file to your scheduler. We need to create a sbatch script. I’ll provide a template here:
#!/bin/bash
#SBATCH -N 1
#SBATCH --ntasks-per-node=44
#SBATCH --output=output.%j.starccm=demo
#SBATCH --time=03:00:00
#SBATCH --job-name=demo_test
module purge
module load mpi

INSTALL_DIR="/shared/apps"
DATA_DIR="/shared/data"
CASE="test.sim"
STARCCM_VERSION="17.04.008-R8"

export PATH=$INSTALL_DIR/$STARCCM_VERSION/STAR-CCM+$STARCCM_VERSION/star/bin:$PATH

starccm+  -batch -power -mpi openmpi -bs slurm -licpath 1999@myLicenseServer.full.dns.name $DATA_DIR/$CASE
To sum it up, I am telling Slurm to run my submission on 1 node and use 44 cores available on that node. Give it a max runtime of 3 hours and call the job demo_test. The magic is executing starccm+ and specifying our batch system as slurm. That’ll take our #SBATCH settings above and use them.
Now, we can run a sbatch slurmtest.sh. We can check our job submission with squeue and see which node is being spin up. We can also check in the CycleCloud UI
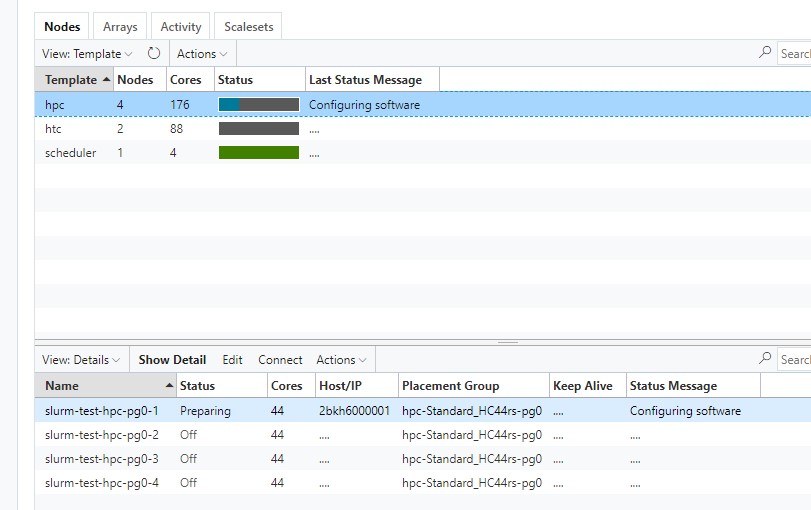
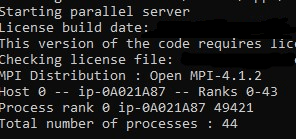
Once the actual vmss instance is started, it’ll create a log file on the scheduler that we set in our sbatch output. If we cat that file, you can verify we have all 44 cores being used.
Once the job is finished, it’ll save it in the same location where the case file was. It’ll be displayed in the output file as well.

What is really cool is that once the job finishes, CycleCloud will spin down the HC44rs vmss instance it created, so we aren’t paying for these large HPC vm’s when not using it. StarCCM pairs really well with Slurm and CycleCloud. I highly recommend it!
